Saltwater Density Investigation
In the A to Z Science series, D was for Density. I shared ways to introduce the concept of density to toddlers and preschoolers. Today I want to show you another way to investigate density using saltwater.

Density is the mass per unit of volume. If you need a density refresher, go back and read the “What is Density” section in the D is for Density post. It even has a great illustration for you.
The saltwater density investigation would be appropriate for preschool and older. I have actually done a very similar lesson with my high school Oceanography students. The lesson does a great job of showing density layers in the water.
Saltwater Density Investigation
Materials:
- clear container (I used a small juice glass)
- containers for mixing the saltwater
- eye droppers, medicine droppers, and/or syringes
- food coloring
- salt
- water
- spoons
The Setup:
You are going to make saltwater solutions with different densities. Then, you will add one solution to another and see what happens.
- Fill two containers with 1/2 cup tap water each.
- Add 1 teaspoon of salt to one of the containers. Add a few drops of food coloring. (container 1)
- Add 1 tablespoon of salt to a second container. Add a few drops of a different color of food coloring. (container 2)
- Fill a clear container (small juice glass) half full of tap water.
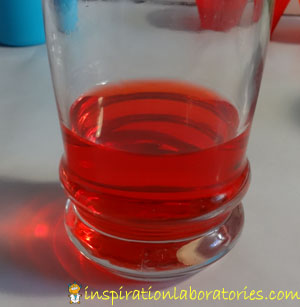


Density layers will form. The higher density water will sink to the bottom.
Saltwater Density Investigation in Video
Here is a quick video I made of the steps above using tap water and green colored saltwater.
What Kids Are Learning
Younger kids are playing with colored water and beginning to gain experiences which will help their concept of density later. They are making observations and predictions.
Older kids (I’ve used this investigation in high school as well) are strengthening their concept of density. They will observe the solutions with the most salt are the most dense (they have more mass per area of volume). The solutions with the least salt will have a lower density (less mass per area of volume). A less dense solution with float on top of a more dense solution. You will create density layers.
Added challenge: Can you create 3 or more density layers? How would you do this?
Here’s a video showing 3 density layers:
More Science Posts
D is for Density – introducing density to toddlers and preschoolers.
Exploring Density and Water Flow Outside – take your density observations outside.
Learn more about what investigate means in A is for Apple Tree Investigation.
Subscribe to the Inspiration Laboratories newsletter. Each issue has exclusive hands-on science explorations for children, a recap of our latest activities, and special resources selected just for you!
Leave a Reply