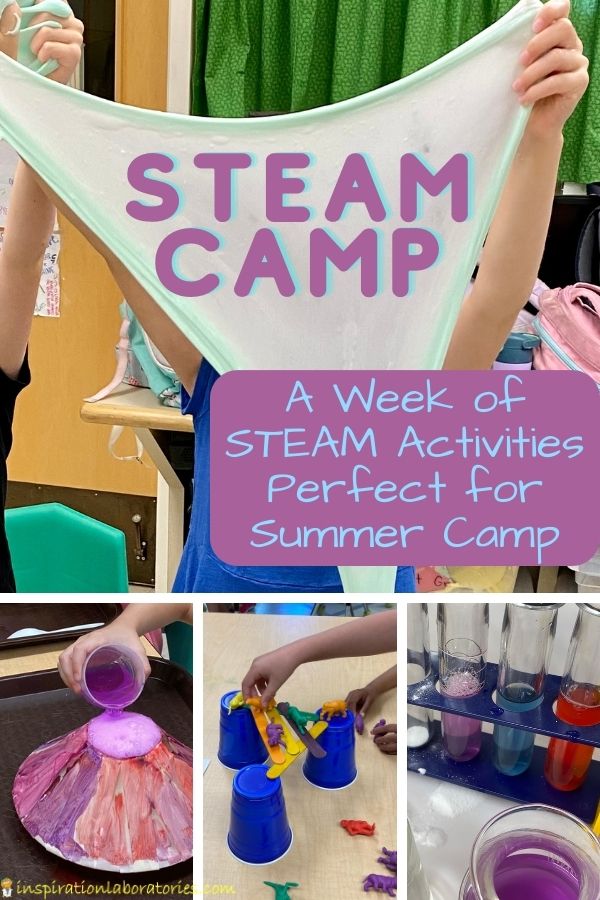
STEAM Activities Perfect for Summer Camp
I am gearing up for another year of STEAM summer camp and I wanted to share the combination of activities we did last year. I think these STEAM activities are perfect for summer camp as many of them take longer to complete than a school year classroom allows. I get commissions for purchases made through the affiliate links in this post.
STEAM Summer Camp
STEAM Camp Format
We had 3 hours of camp for 5 days. Drop off and pick up took about 20 minutes out of the total day.
After campers arrived on Monday, we talked about what STEAM is. I gave them an overview of our projects for the week. We also discussed expectations for material use, behavior, and clean up.
This was a messy camp. I told campers it was okay to make a mess, but any mess they made had to be cleaned up. We tried to confine our messes to the trays and bins I provided.
Typically we did one activity and then took a bathroom break, washed hands, and ate snack. During snack, I read a book.
After snack we worked on our next two projects. If we had any time left at the end of the day, I had materials for free building or an extra STEM challenge ready to go.
STEAM Camp Activities
Camp Description
Science and art will be joining forces to create some colorful and messy projects. Make color changing potions and build volcanoes with baking soda and vinegar. Rescue animals from ice and design new habitats for them. Make squishy goo, fizzy play dough, and slime. Design and build paper airplanes, boats, and bridges.
Day 1
Baking Soda and Vinegar Intro
Campers mixed baking soda and vinegar together to observe the reaction.
We added a squirt of dish soap to the mix and they compared how the reaction changed. The soap makes the fizzy bubbles turn to foam.
Snack Time Book: Jabari Tries by Gaia Cornwall

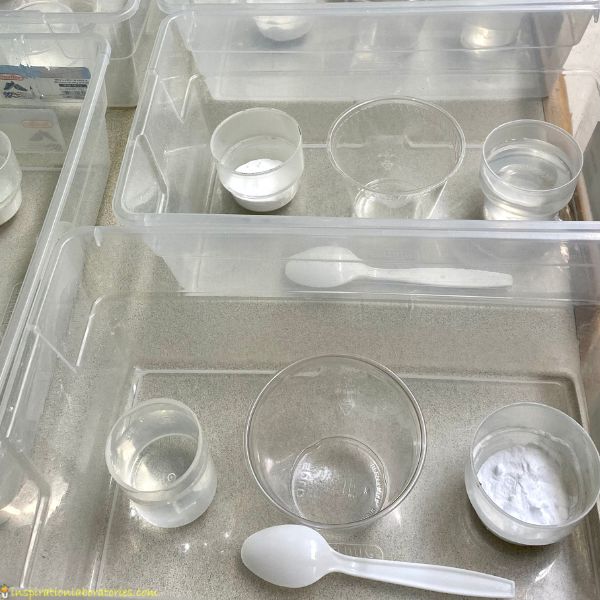
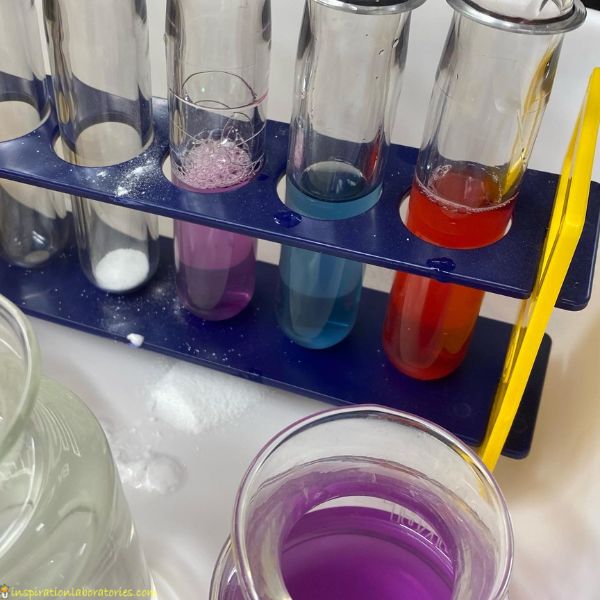
Color Changing Fizzy Potions
Get the details for color changing fizzy potions here. We used red cabbage juice as a pH indicator. The “potions” changed colors depending on how much acid or base was in the mixture.
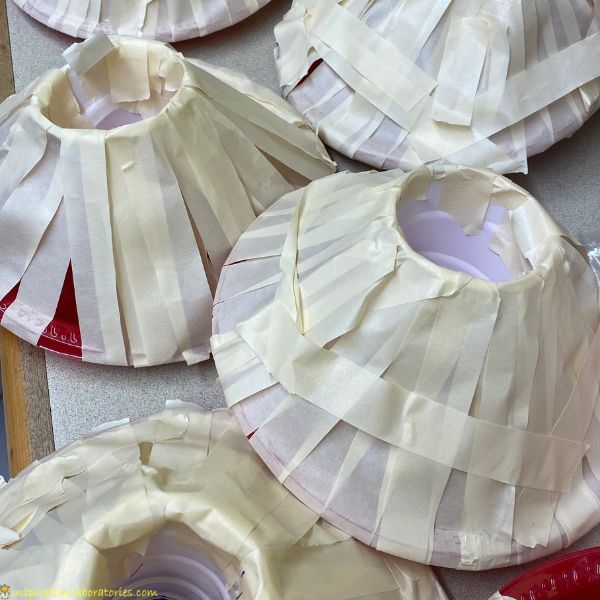
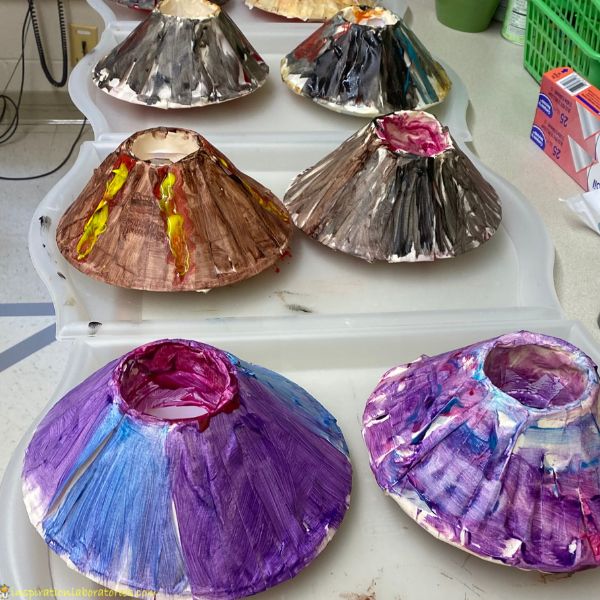
Build Tape Volcanoes
Get the details for building tape volcanoes here. Our tape volcanoes ended up being a 3 day process. We built the volcanoes on day 1, painted them on day 2, and erupted them on day 3. We probably had enough time to paint them on day 1, but I didn’t want to rush them. If you start with tape volcanoes, you would have time to build, paint, and erupt all in one day.
Day 2
Paint Tape Volcanoes
We started with painting the tape volcanoes. We used washable paint (Colorations Biocolor) for easy clean up. Some of washable paint will come off of the volcanoes when erupting. Use acrylic paint if you don’t want the paint to wash off. Just be careful with clothes and surfaces. You could also use colored tape and skip the painting altogether.
Animal Ice Rescue
You’ll need to prep this the day before. Add toy animals to small cups. (I used these Terra by Battat wild animals.) Cover with water. Add a few drops of washable liquid watercolor if you want to hide the animals. Freeze. My school’s freezer was full of freezer pops from the the sports camps, so I had to freeze my animals at home. I brought a small cooler with me the next day.
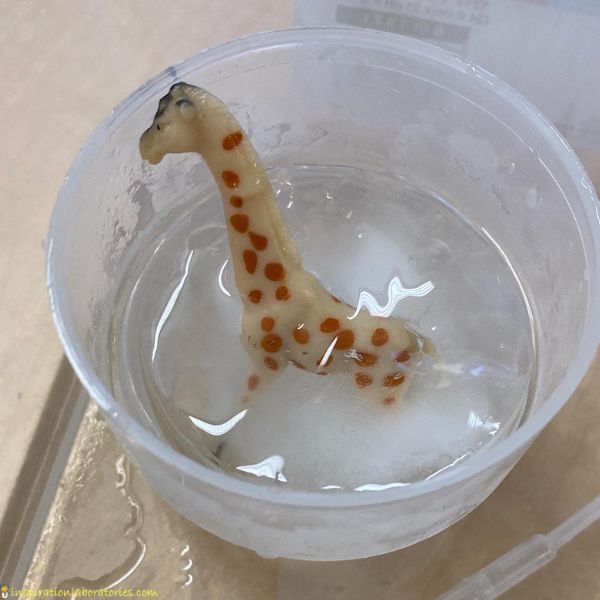
I gave each camper a bin, the frozen animal cup, a pipette, and a cup. I showed them how to use the pipette.
We brainstormed ways they could rescue their animal with the given tools. Many of them said they wanted water to help rescue the animals. Some of them specifically wanted hot water. I allowed my students to fill their cups with water – whatever temperature the sinks produced (not too hot). You might want to provide a cup full of water at the start. Salt is another way to melt the ice faster. Check out our frozen dragon eggs for more about adding salt to the mix.
Snack Time Book: Too Crowded by Lena Pedesta

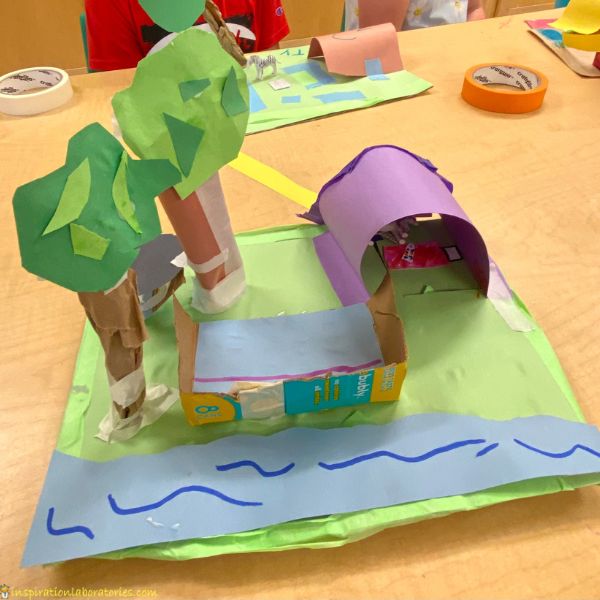
Build Animal Habitats
I provided a variety of materials for campers to build habitats or homes for their rescued animals. We used cardboard cereal boxes as the bases for their creations. You could also use paper plates or heavy card stock.
They had access to colored tape, scissors, and construction paper, and items from the recycling bin. I prefer tape as the fastener because you don’t need to worry about it drying before they leave.
Day 3
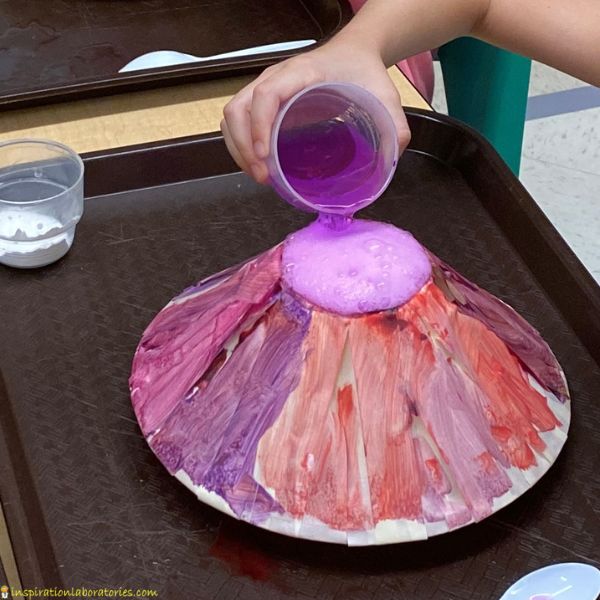
Erupt Tape Volcanoes
Campers were given baking soda and vinegar. I added a few drops of washable liquid watercolors to their vinegar in their chosen color. Campers decided if they wanted dish soap in their volcano based on what type of eruption they wanted. They needed to remember what happened on Monday when they added dish soap.
Oobleck
Each camper was given a plastic bin the size of a shoe box. They added 1/2 cup corn starch to their bins. Then, they add water until oobleck was formed (no more than 1/2 cup of water should be needed). Read more about oobleck here.

Snack Time Book: Cats Are a Liquid by Rebecca Donnelly

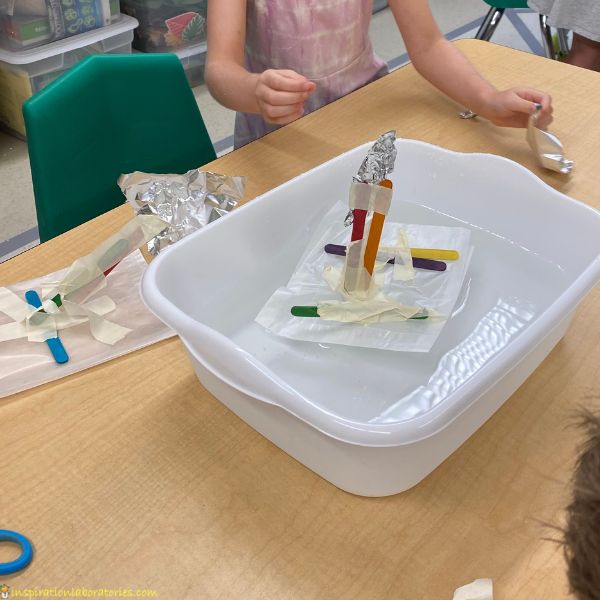
Build Boats
Campers were each given 6 craft sticks. They also had access to masking tape, wax paper, aluminum foil, card stock, and markers. They were challenged to build a boat that could float. I gave each table a dish bin filled with water. Need more ideas? Check out this post with 25 boat building ideas.
Day 4
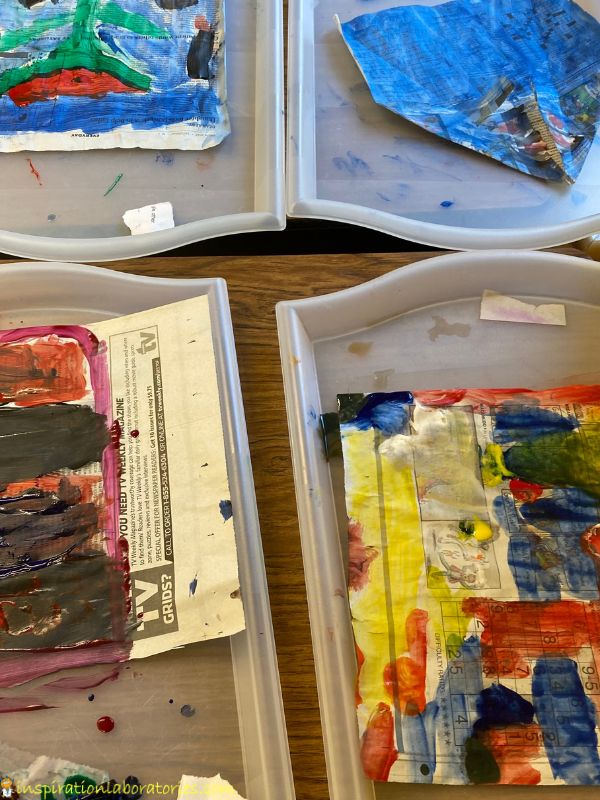
Paint Newspaper for Paper Airplanes
We cut newspaper sheets into 4 sections, so each table member had a large piece. On a tray they each painted one side of the newspaper. I encouraged them to use only one coat of paint so it would dry soon for the next part of our activity.
Fizzy Play Dough
Get our recipe and details for fizzy play dough here. I allowed my first camp group to make the fizzy play dough themselves. It was a huge mess. My second week of camp wasn’t very good at cleaning up, so I did the Floor is Lava STEM challenge (info further down). My third week of camp really wanted to do fizzy play dough, so I made the dough for them. They still made a bit of a mess, but they cleaned it up really well.
Snack Time Book: The Great Paper Caper by Oliver Jeffers

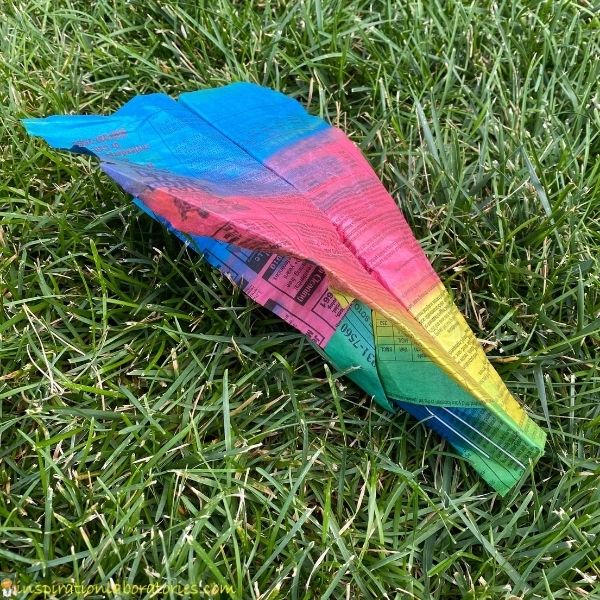
Build Paper Airplanes
I taught my campers how to build a paper airplane. We practiced with regular sheets of paper. Then, they used their favorite design to make a paper airplane out of the painted newspaper. The newspaper is tricky because it is thinner than regular paper. I recommend doubling up and using two sheets of newspaper. Find the directions (and video) for how I make paper airplanes here.
Day 5
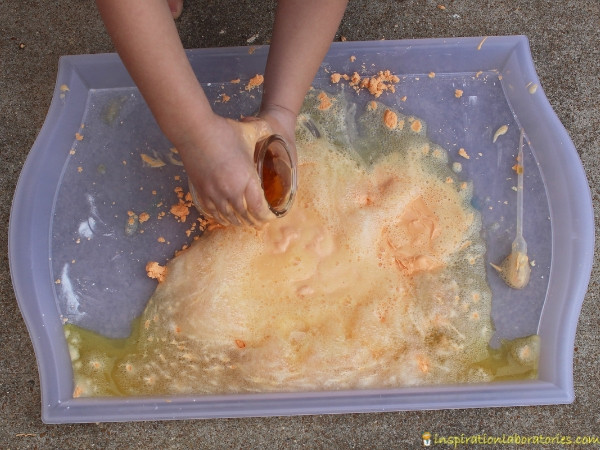
Slime
Use your favorite slime recipe. We used white glue and Elmer’s Magic Liquid one week. It wasn’t my favorite version of slime. I know a lot of people have success with it, but I think it may need clear glue. Clear glue costs double so I chose not to purchase it for our camp.
For the other weeks of camp, I used white glue and liquid starch. That recipe is no fail and works every time. I recommend having campers mix their slime in a plastic cup with a craft stick or spoon. Don’t plan on washing the cups for reuse. They are a pain to clean if the slime wasn’t mixed well before kneading.
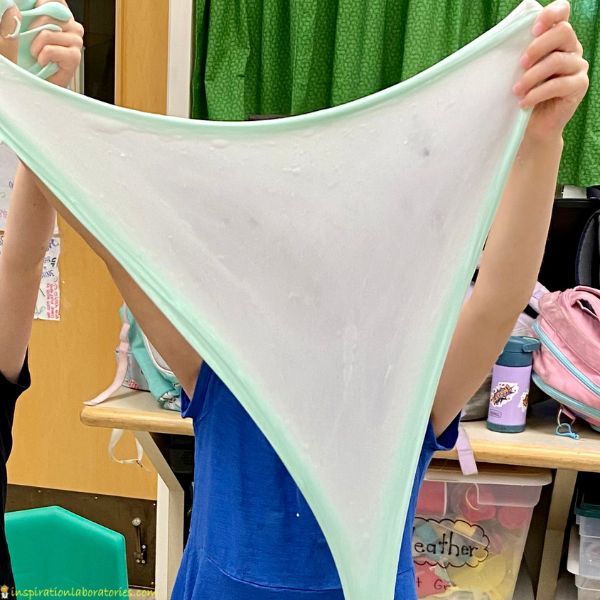
Need a slime recipe? Here’s my favorite slime recipe for small batches. (It’s only Halloween themed because it’s orange.) This is perfect for each camper to make the slime on their own.
Snack Time Book: Ada Twist, Scientist by Andrea Beaty

Build a Bridge
I brought in a ton of recycled cardboard. I also asked teachers to save paper towel rolls and cereal boxes for me. The thin cardboard from cereal boxes (and sparkling water boxes) is easier to cut than regular cardboard boxes. Campers also had access to leftover containers from the week, newspaper, masking tape, and scissors.
I challenged campers to build a bridge from one side of the table to the other. There weren’t really any other constraints. You could make it more difficult by requiring the bridge to be raised off of the table at certain points. Some groups naturally did this. Others chose to place a row of boxes across the table and call it a bridge.
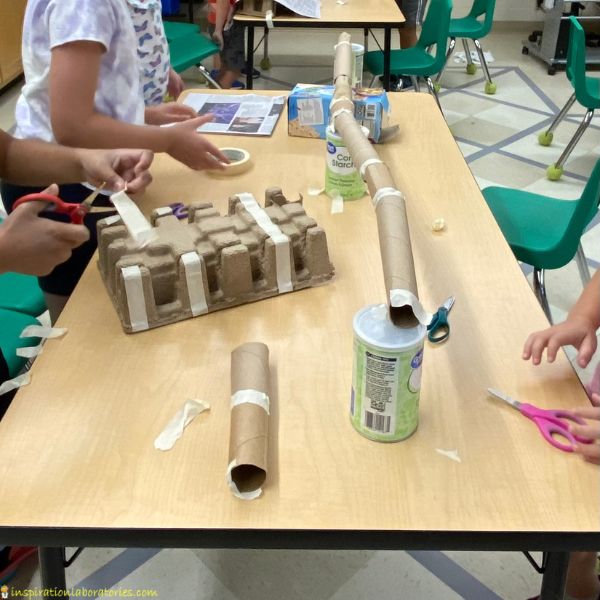
The bridge designs were as varied as the materials they used.
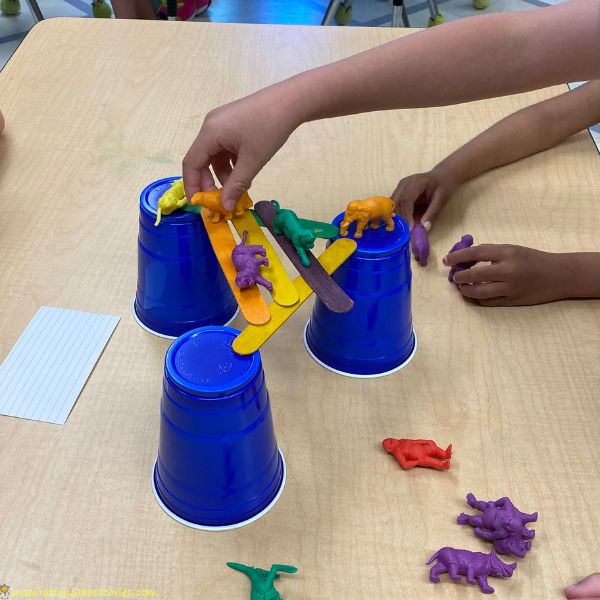
Time Fillers
On days that we finished all of projects early, I had materials available for free building or I had a STEM challenge ready to go. Below are two of the campers favorites.
Free building with 3Dux Design cardboard and connectors kit – I have the classroom kit which is great for 16 kids. Any more than that, you will run out of connectors. I showed my campers how to connect the cardboard using the connectors. Then I let them build whatever they want.
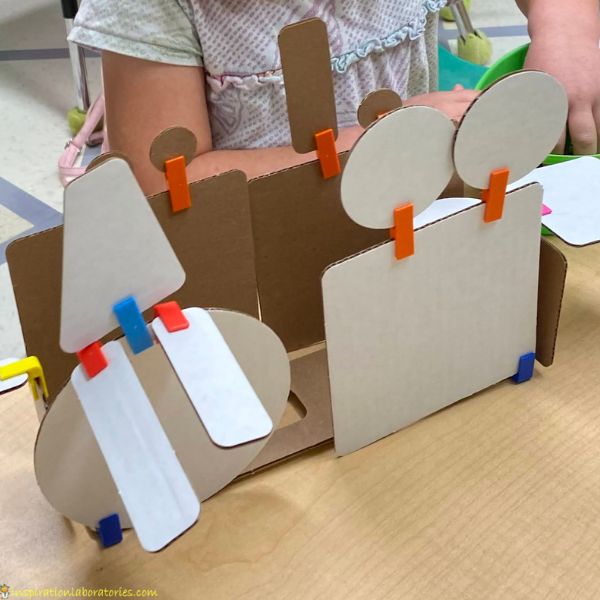
Boxitects would be a great book to go along with this.
Floor is Lava STEM Challenge – I saw this challenge on Instagram my second week of camp, so I added it in.
Campers loved it. I had each camper work individually at first. Then, they were able to work together with the supplies of one person to see if they could rescue more animals.
KEVA planks – This summer I have KEVA planks in my classroom. I have some STEM challenges planned using the KEVA planks. I also plan on allowing free building with the KEVA planks if we finish projects early.
Additional Thoughts
This summer I am doing another STEAM camp. I have named it STEAM Camp 2.0. It has all new projects, so any campers that came last year will be able to come again. I have reduced the number of messy projects. We will still have paint and fizzy fun, but in a quicker to clean-up way.
If you try any of these activities, please tag me on Instagram: @inspire_labs. I’ll share what you’re doing with others!
Leave a Reply