How to Host a Classroom Robot Party
While trying to think of ideas for my son’s second grade class party, a classroom robot party came to mind. I planned a spring party full of robot activities that appealed to a variety of people. This would make a great robot birthday party, too! HEXBUG and Learning Resources helped make the party possible. Read on to learn about the details. I get commissions for purchases made through the affiliate links in this post.

How to Host a Classroom Robot Party
I planned for 6 robot activities including a snack. We did the snack activity first and then the students rotated through the 5 robot activity stations. I had several fabulous room parents to help me lead the activities and pass out snack supplies. The key to making the party a success is planning and organization. I had all the supplies organized by activity and directions for each station. The directions were for the students as well as the parents leading the stations. I e-mailed a plan for the robot party including the activity instructions to the room parents before the day of the party. There were extra parent volunteers on hand that didn’t get the e-mail and they easily stepped up and led the activities with minimal direction from me.
HEXBUG donated a HEXBUG nano for each student in exchange for featuring them in this post. The HEXBUG nanos are pretty inexpensive robots at $4.99 each. You can also get a 5-pack on Amazon for about $16. Target has them for the same price. The HEXBUGs make great party favors.

Robot Party Snack: Code a Secret Message
Materials Needed:
- Cheez-Its Scrabble Junior
- M&M’s (and/or other candies)
- Paper plates
- Substitution Cipher printable PDF, 1 for each student
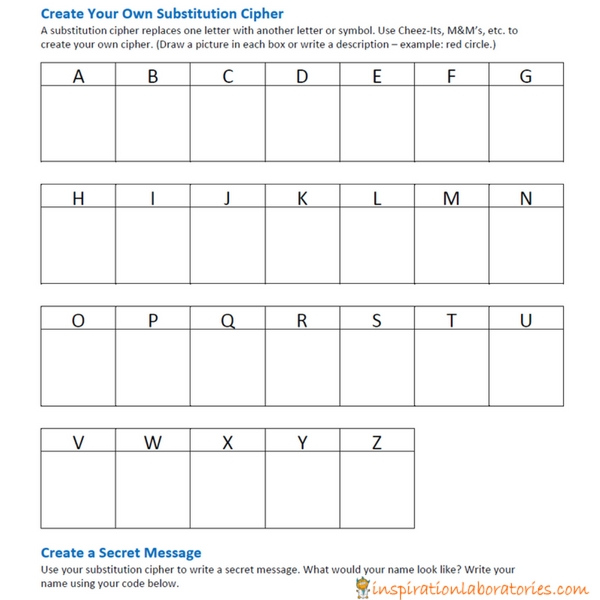
Use Cheez-Its, M&M’s, and other candies to create your own substitution cipher. A substitution cipher replaces one letter with another letter or symbol. The goal is to use a different Cheez-Its letter or M&M’s color to represent each letter of the alphabet. If your students have never worked with secret codes, they’ll need to be walked through this activity. Some of our kids didn’t understand that they were to choose one letter or color to represent a letter in the alphabet. Some of them had blue M&M’s on multiple letters for example. Thankfully, our second grade teacher showed everyone an example up on the board while I was setting up the other stations.
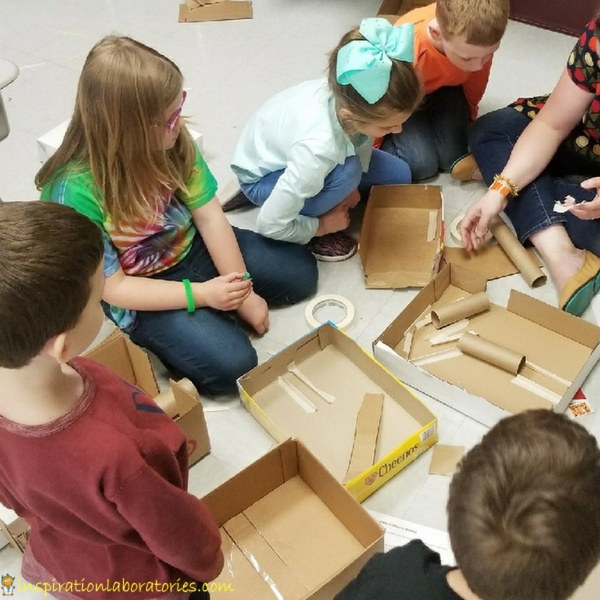
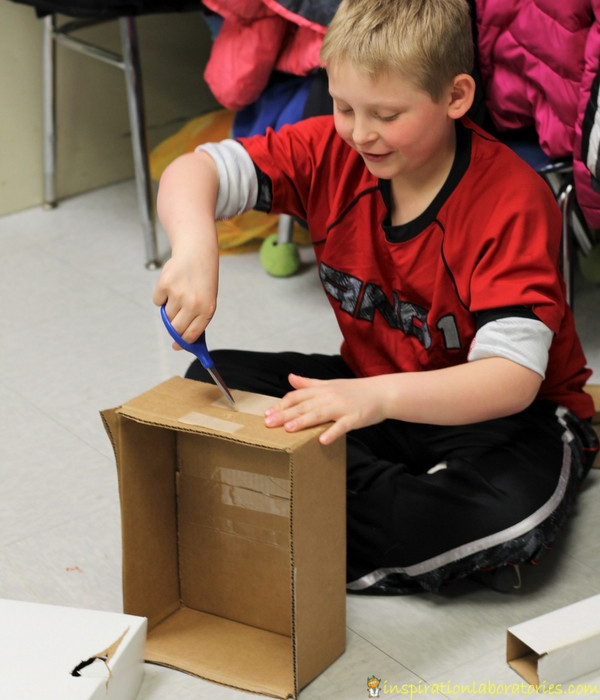
Robot Party Activity: Build a HEXBUG Maze or Habitat
Materials Needed:
- HEXBUG nano
- Cereal boxes and/or cardboard boxes (The boxes need to have flat bottoms. Add a piece of cardboard to fill the gap.)
- Cardboard tubes
- Craft sticks and/or cardboard to create walls
- Tape (we used masking tape, packaging tape, and Scotch tape)
- Scissors
Instructions:
Build a maze or playground for your HEXBUG. Use cardboard tubes, craft sticks, cardboard, tape, etc.
You may add to or change any of the habitats/mazes that are here. Or you can start your own. The goal is to explore the materials with your HEXBUG. Create a playground for it. Build a maze and see how long it takes to get through it. Race your HEXBUG against someone else’s. Be creative and have fun.
Example HEXBUG Mazes/Habitats:
- HEXBUG Habitat Engineering Challenge
- HEXBUG Playground from Frugal Fun for Boys and Girls
- HEXBUG Track from I Am Momma – Hear Me Roar
Robot Party Activity: HEXBUG Art Bots
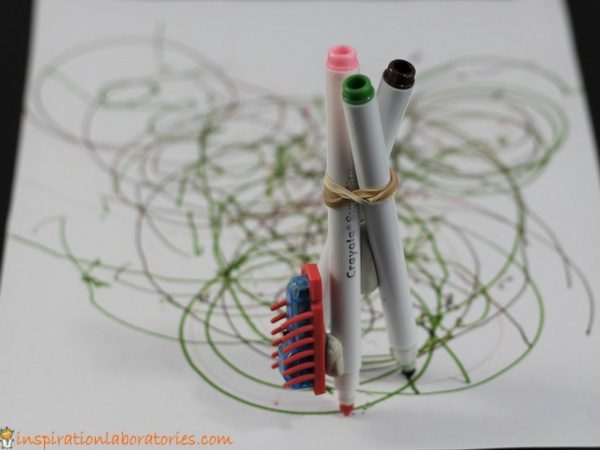
Use a HEXBUG and markers to create a spinning drawbot. Inspiration for this activity is from Science Sparks’s HEXBUG Powered Pens.
I placed materials for each student in gallon size plastic bags. This made it easy to distribute the materials and gave each student a bag to put all of their party supplies in.
Materials Needed:
- HEXBUG nano
- 3 markers (any size markers work, but we found the skinny markers move a bit easier)
- Paper
- Rubber bands
- Mounting putty (2 pieces)
Instructions:
- Place a piece of paper in front of you.
- Wrap a rubber band around the 3 markers.
- Separate the markers and create a tripod.
- Place the big piece of putty in between the markers to help form the tripod. The markers should be able to stand up. All 3 markers should touch the paper.
- Use the small piece of putty to attach your HEXBUG to the one of the makers.
- Remove the caps from the 3 markers.
- Place your artbot on the paper.
- You can experiment with where to put the HEXBUG. Does it change how the artbot draws?
- Turn on the HEXBUG and watch it draw. Keep your artbot on the paper.
- When finished place the caps back on the markers.
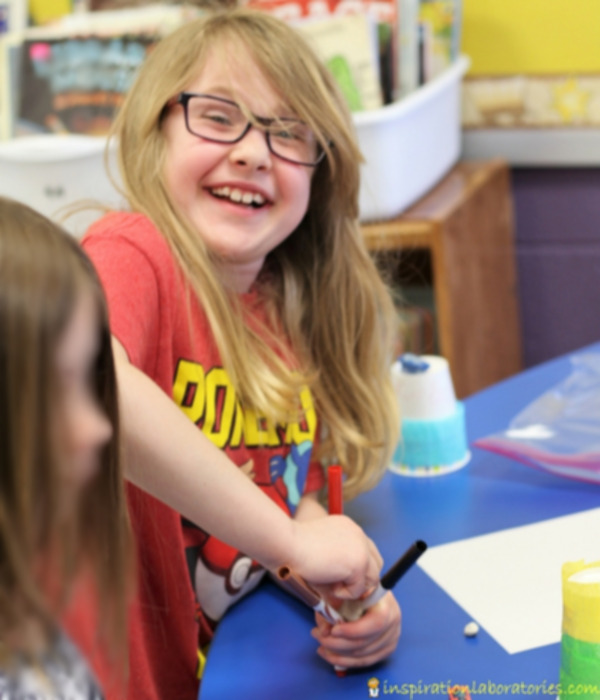
Robot Party Activity: HEXBUG Costumes
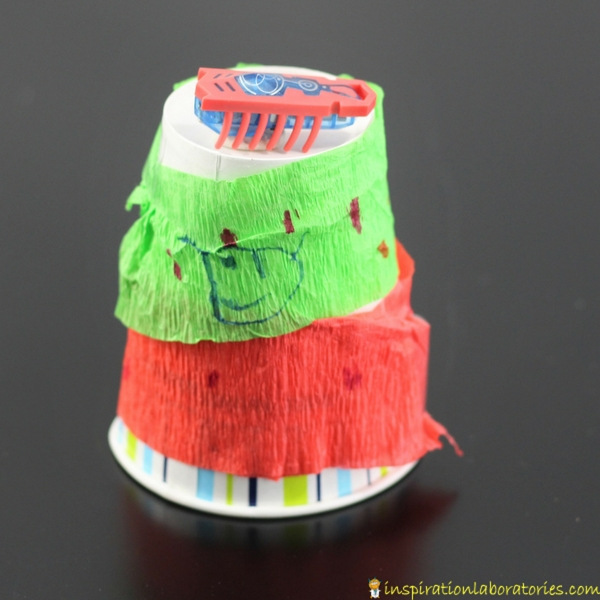
Create a costume for your HEXBUG. Use paper cups, paper, tissue paper, paper clips, tape, markers, and putty.
Start with a paper cup and place your HEXBUG inside. Attach your HEXBUG to the inside of the cup with a piece of putty. Decorate your cup to create the costume. (Some of our students attached their HEXBUGs to the top of the cup. It worked, too.)
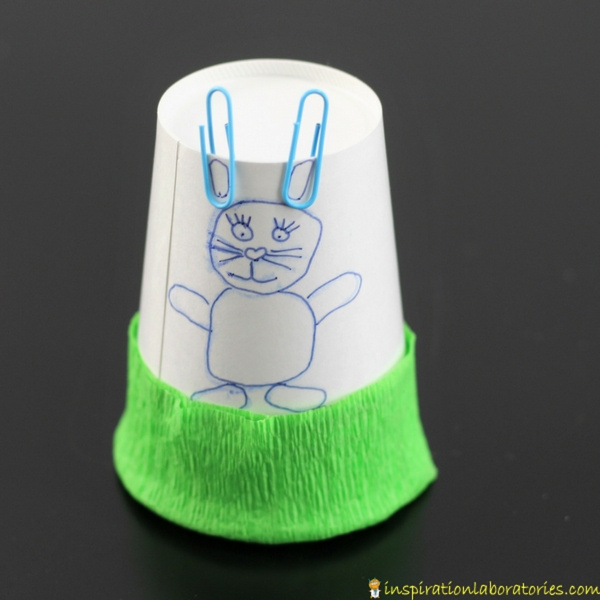
Turn on the HEXBUG. Can it move the costume? If not, try changing the position of the HEXBUG inside the cup. Will it work if you place it on a wall? Do you have something on the bottom of the cup that is keeping it from moving?
You could also try decorating your HEXBUG directly like HEXBUG did with their nano lovebug.
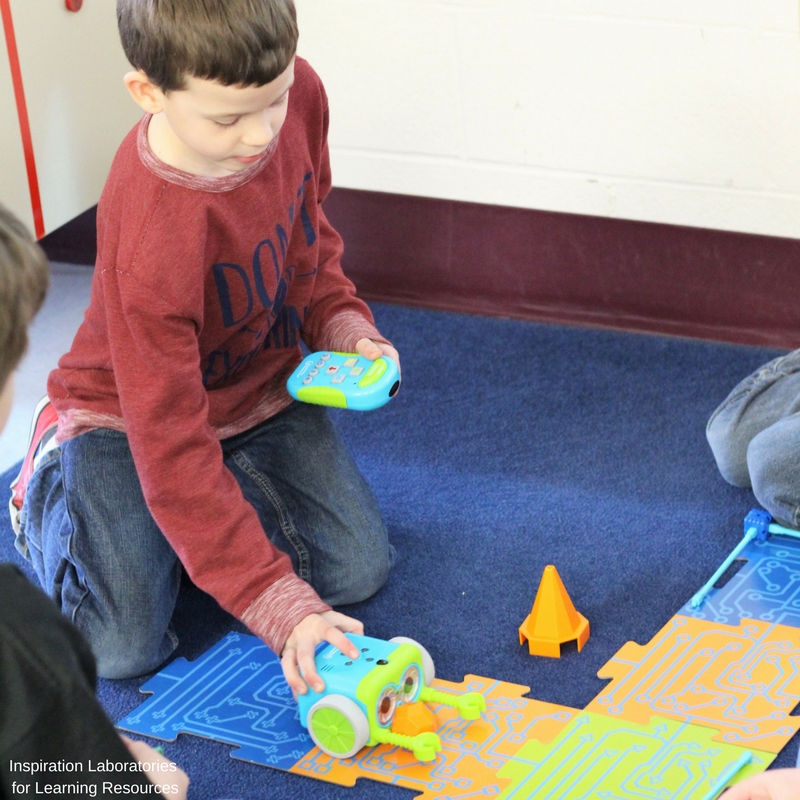
Additional Robot Party Activities
I write for the Learning Resources blog, so they send me products to write about. Botley is their newest coding robot. I took Botley and two Code & Go™ Robot Mouse Activity sets to the party. Head over to Learning Resources to check out the rest of the robot party.
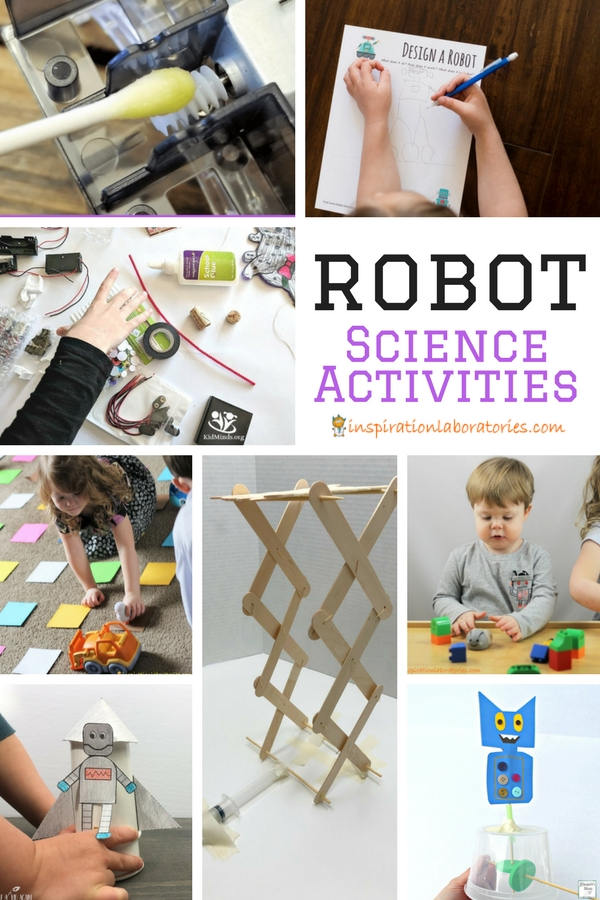
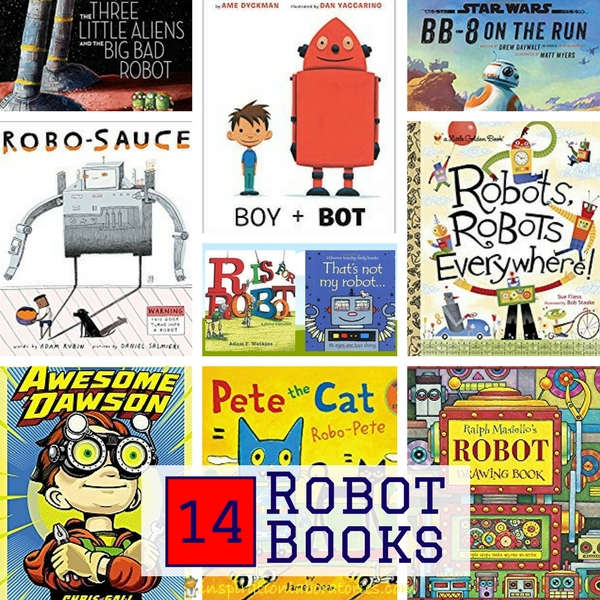
More Robot Activities for Kids
Check out this collection of Robot Science Activities.
You’ll also love these robot books.
Subscribe to the Inspiration Laboratories newsletter. Each issue has exclusive hands-on science explorations for children, a recap of our latest activities, and special resources selected just for you!
Leave a Reply