Glow in the Dark Monster Shirt
I want to thank I Love to Create for sponsoring this post. They sent us some Tulip glow paint to try out. We created a glow in the dark monster shirt from Aiden’s own artwork. We also painted glow in the dark pumpkins.
Tulip Glow Paint
Tulip glow paint is super cool. The paints glow in the dark after being activated with light. Place the painted item in light (sunlight or incandescent light) for several minutes or under a UV light (a black light) for a minute. The glow paint is dimensional so it’s puffy. You can also brush it on flat but you may need a few coats. It’s fabric paint so you can follow the directions on the packaging and actually wash the clothes you paint. The paint also works on other surfaces, too.
Glow in the Dark Monster Shirt
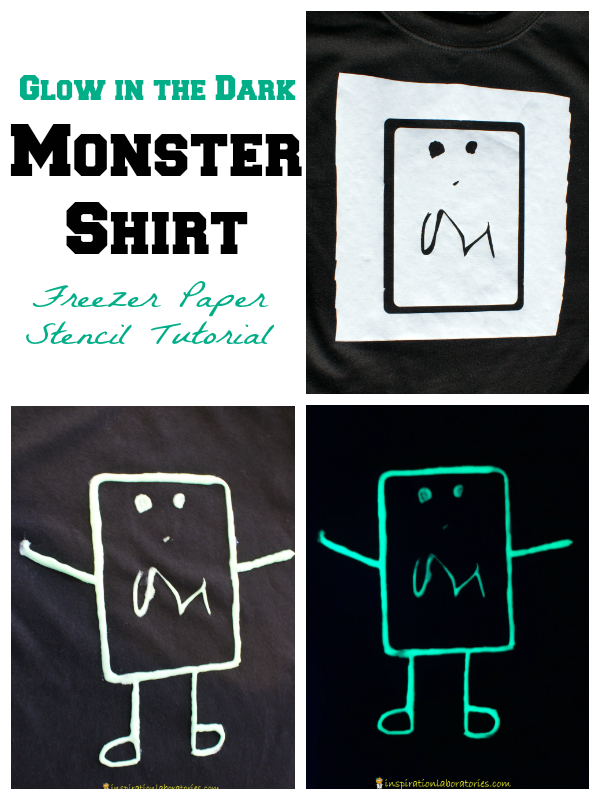
I created a freezer paper stencil {just like I did for Aiden’s airplane birthday shirt}. Here’s what you’ll need:
- Freezer paper
- Shirt
- Tulip glow paint
- Silhouette Cameo {or another digital cutting machine or a utility knife}
- Paper
- Markers
Before You Begin
Cover your work surface. Place a piece of freezer inside your shirt to prevent the paint from seeping through to the back. Iron any wrinkles out of your shirt. {I do this on top of an ironing board.}
Create Your Design
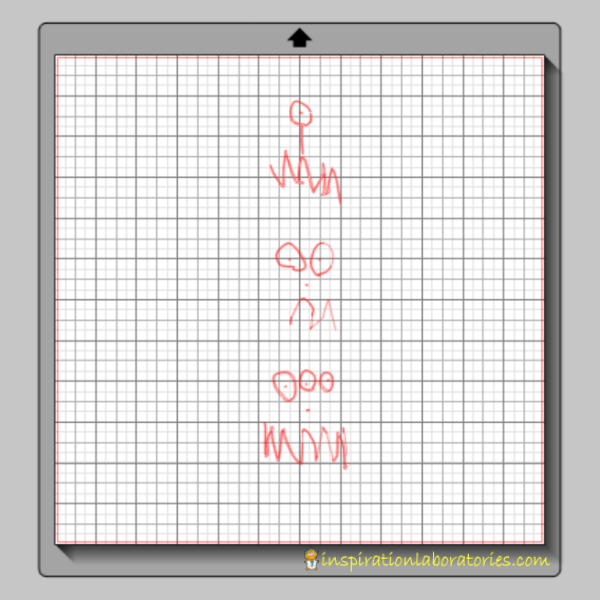
I had Aiden draw some monsters for me. He drew several and we picked three to use for our monster shirts. Scan the drawings {or take a picture of them} and open them into your Silhouette Studio software. Arrange the images onto your screen. Flip the images horizontally.
Use the Trace tool to turn the pictures into a design you can cut out.
Create Your Stencil
Cut a piece of freezer paper the size of your cutting mat {or slightly smaller}. Place your freezer paper on your cutting mat shiny side up. It seems to cut better this way. You will need to iron your freezer paper shiny side down. This is why we flip the image.
For my Silhouette Cameo, I used blade setting 1, speed 3, and thickness 14.
{If you don’t have an electronic cutting machine, you could cut out the stencil by hand using a utility knife.}
Paint Your Shirt
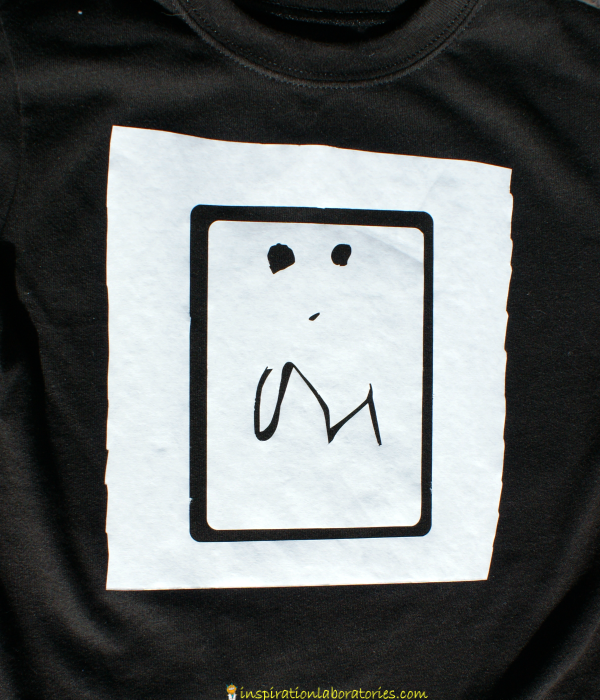
Flip the freezer paper over and iron it to the shirt. Be sure to iron the edges of the stencil really well so the paint will not seep under. Use the Tulip glow paint to paint on top of the stencil. I was able to squeeze the paint directly onto my shirt. If you use a brush, you might need more than one coat of paint.
Carefully peel away the freezer paper.
Let the paint dry for at least 4 hours. Follow the directions on the paint bottle for laundering your shirt.
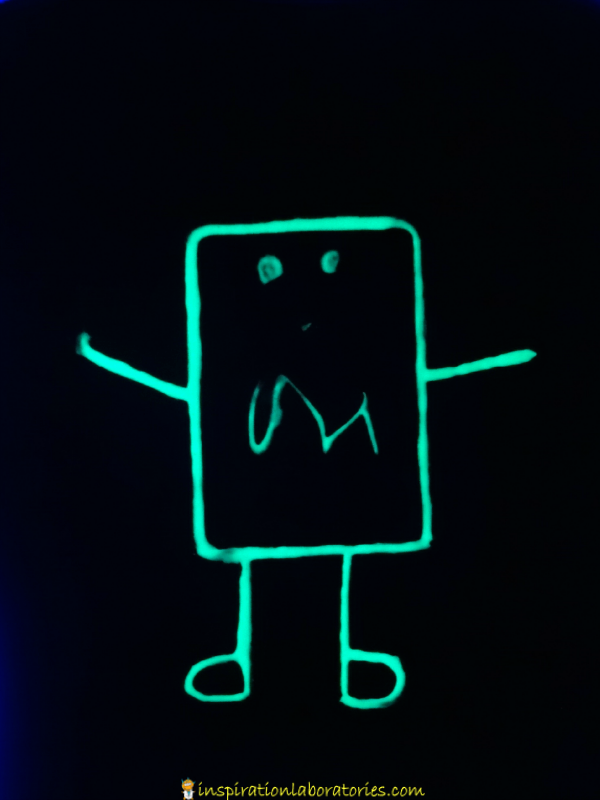
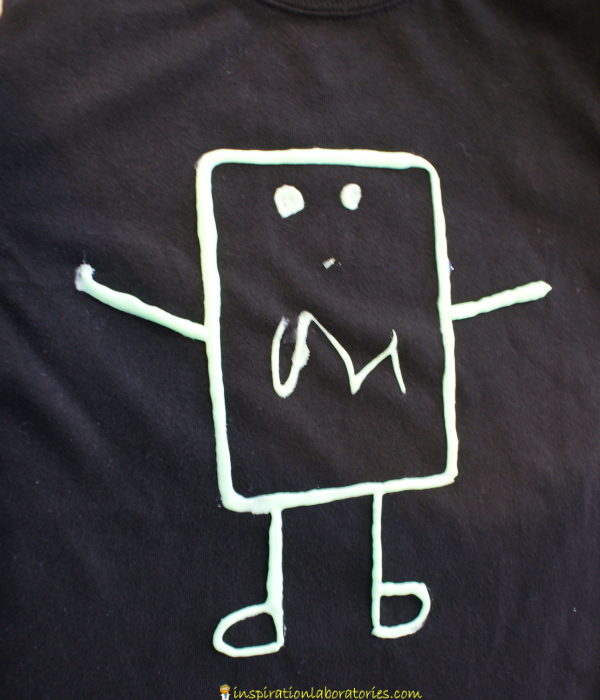
The Finished Monster Shirt
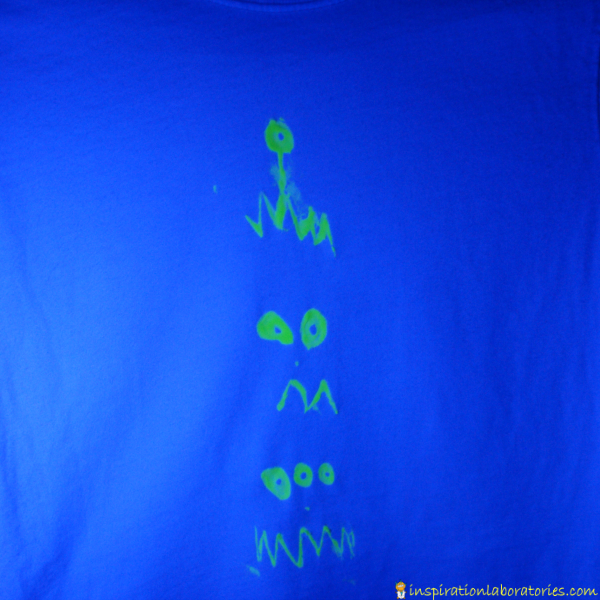
Here is what our finished shirt looks like under a UV light (a black light). The black light really makes the glow in the dark paint stand out. I just love that we were able to place Aiden’s artwork on his shirt.
This is a second shirt we painted with 3 monsters. The shirt was white, so you can see the UV light reflecting off of the shirt as well as helping the paint glow.
Glow in the Dark Pumpkins
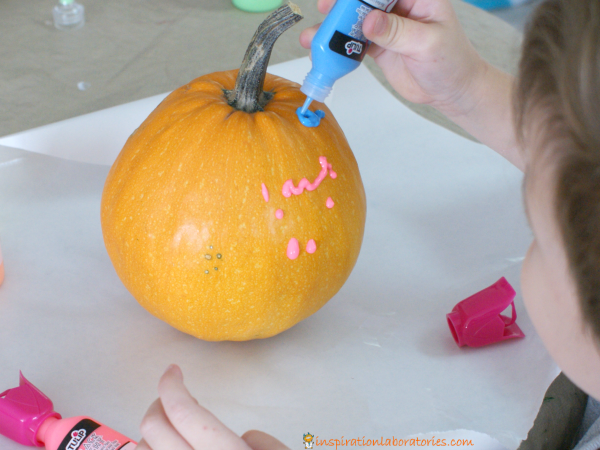
While I was painting the monster shirt, Aiden used the Tulip glow paint to paint some pumpkins. He used every color to create a special spooky pumpkin. Then, he painted stripes on his sister’s pumpkin.
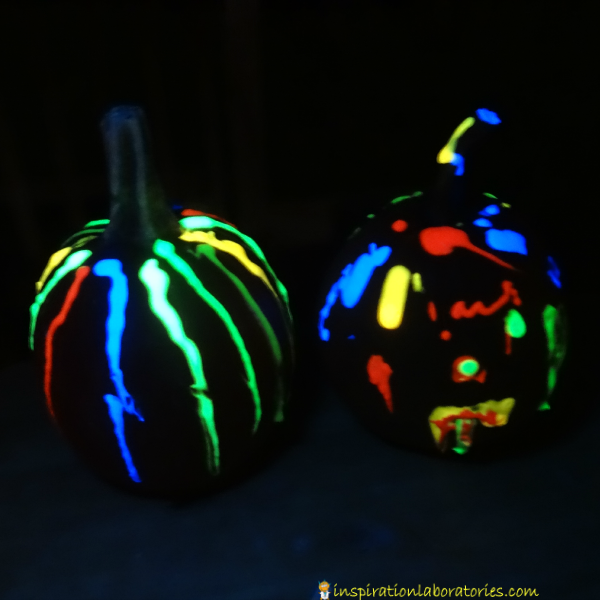
Here are Aiden’s glow in the dark painted pumpkins under UV light. How cool are they?!
More Great Project Ideas
For more great project ideas, connect with I Love to Create on:
What would you make with the glow in the dark paint?

Disclosure: This post is sponsored by I Love To Create. See disclosure policy for more info.
Leave a Reply